> For the complete documentation index, see [llms.txt](https://easonwang.gitbook.io/web_advance/llms.txt). Markdown versions of documentation pages are available by appending `.md` to page URLs; this page is available as [Markdown](https://easonwang.gitbook.io/web_advance/smpt-pop-imap.md).
# SMTP、POP、IMAP
這三個都是郵件相關協定。
> * SMTP is the industry standard protocol for sending email. If you’re looking to send email, then you’ll use SMTP instead of IMAP. An [SMTP relay service](https://www.socketlabs.com/smtp-relay-service/) can help you send email without having to build your own SMTP server.
> * IMAP is one of the most common protocols for receiving email. IMAP syncs messages across all devices.
> * POP3 is another protocol for receiving email on a single device. Using POP3 means that your email will be accessible offline and deleted from the server.
## SMTP
Gmail為例:
```
smtp.gmail.com
需要安全資料傳輸層 (SSL):是
需要傳輸層安全性 (TLS):是 (如果可用)
需要驗證:是
安全資料傳輸層 (SSL) 通訊埠:465
傳輸層安全性 (TLS)/STARTTLS 通訊埠:587
```
可以用Gmail 提供的服務然後搭配相關模組來傳送郵件。
```javascript
const nodemailer = require('nodemailer');
var transporter = nodemailer.createTransport({
service: 'gmail',
host: 'smtp.gmail.com',
auth: {
user: 'somerealemail@gmail.com',
pass: 'realpasswordforaboveaccount'
}
});
const mailOptions = {
from: 'somerealemail@gmail.com',
to: 'friendsgmailacc@gmail.com',
subject: 'Sending Email using Node.js[nodemailer]',
text: 'That was easy!'
};
transporter.sendMail(mailOptions, function(error, info){
if (error) {
console.log(error);
} else {
console.log('Email sent: ' + info.response);
}
});
```
如果用 Gmail 無法送信記得去設定以下
> 沒設定會說 credential 錯誤

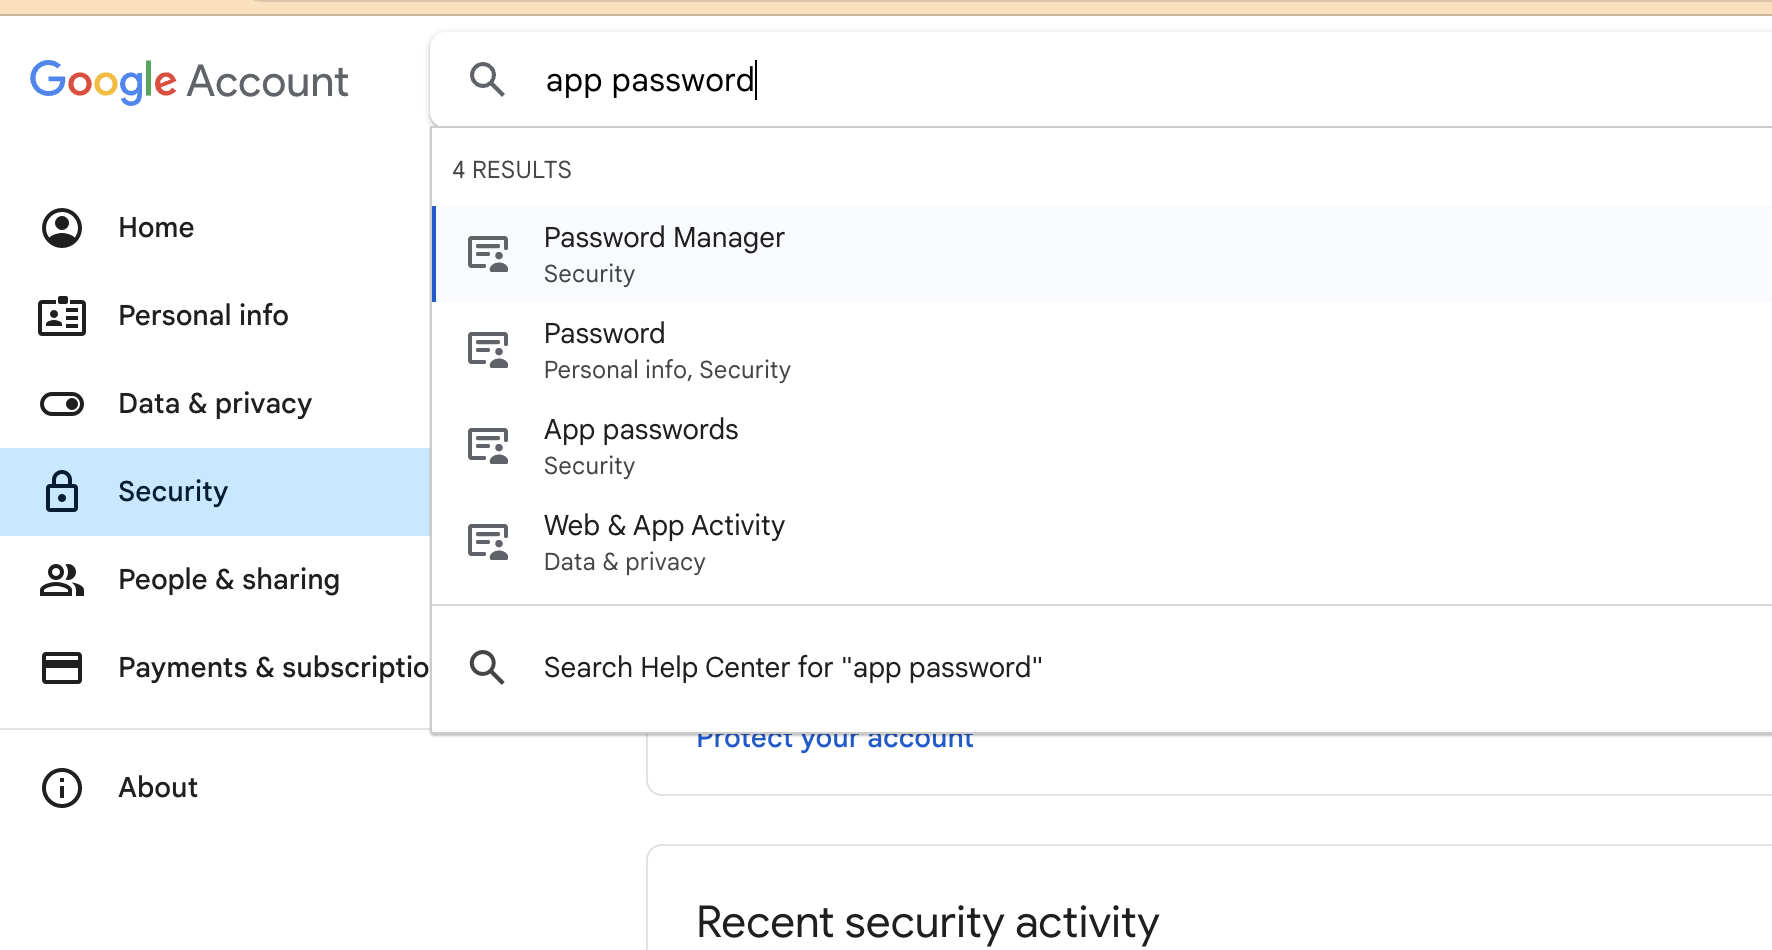
2024 更新:
現在需要去 app password 產生密碼,才能放在代碼的密碼欄位,不然會出現 `Username and Password not accepted`
> 要用上方搜尋直接輸入,不然可能找不到
## POP
Gmail 為例:
```
pop.gmail.com
需要安全資料傳輸層 (SSL):是
通訊埠:995
```
## IMAP
可以用來讀取郵件
Gmail 為例:
```
imap.gmail.com
需要安全資料傳輸層 (SSL):是
通訊埠:993
```
{% embed url="" %}
## DKIM
{% embed url="" %}
> setup dmarc, testing using
## 發送大量 Email
{% embed url="" %}
## Gmail 傳送 html 技巧
因為 gmail 現在 無法插入html,所以要用開啟網站後 ctrl + c 複製,之後直接貼在mail 內文。
如果改變貼上去的大小,可以先把網頁縮小成你要的樣子(例如手機的比例)然後再複製。
> 如果想要大量傳送信件可以從 db query 出來後點選匯出,之後整個複製貼到 gmail 收件人上面 (用空格分隔),這樣的好處是可以一次寄 500 封,如果用程式只能一次送 100 封

> 記得用密件副本傳送!
## Email OTP 登入驗證流程
1. user 輸入帳密後需要輸入 email,之後發送驗證碼,輸入相同驗證碼 後可登入
2. server 接到 user 發送 email 認證的請求後,隨機產生六個號碼存 DB
3. 之後寄給使用者 email 這六個號碼,然後 user 在頁面上輸入六個號碼後將號碼發回 server ,如果相同及回傳 auth token 給 user,之後即可登入隨機產生六個號碼, DB 。