> For the complete documentation index, see [llms.txt](https://easonwang.gitbook.io/web_advance/llms.txt). Markdown versions of documentation pages are available by appending `.md` to page URLs; this page is available as [Markdown](https://easonwang.gitbook.io/web_advance/aws/kuai-su-ba-ec2-chuan-shang-aws-cloudfront-cdn.md).
# 快速把 EC2 串上 AWS Cloudfront CDN
## 最簡易的流程
EC2 URL 直接綁定到 Cloudfront ( Cloudfront Origin 直接填入 EC2 頁面上的 Public IPv4 DNS)
 記得下方填入網域名稱,與申請對應 https 證書即可
 ***
## 以下為加上 load balancer 之流程
整理流程為 server <- load balancer <- CDN <- client
> 除了 client 到 CDN 為 HTTPS,從 CDN 到 load balancer 再到後面都是走 HTTP
## 1. 先在 EC2 架設好 server,聽 3000 PORT
## 2. 設置 nginx
```
sudo apt update && sudo apt install nginx
sudo systemctl start nginx
vim /etc/nginx/sites-available/default
```
加上以下 config
```yaml
server {
listen 80;
server_name example.com; # Replace with your domain name or server IP
location / {
proxy_pass http://localhost:3000;
proxy_http_version 1.1;
proxy_set_header Upgrade $http_upgrade;
proxy_set_header Connection 'upgrade';
proxy_set_header Host $host;
proxy_cache_bypass $http_upgrade;
}
}
```
## 3. 接著在 AWS Load balancer 那邊新增 target group (目標群組)
> 選擇使用 HTTP
***
## 以下為加上 load balancer 之流程
整理流程為 server <- load balancer <- CDN <- client
> 除了 client 到 CDN 為 HTTPS,從 CDN 到 load balancer 再到後面都是走 HTTP
## 1. 先在 EC2 架設好 server,聽 3000 PORT
## 2. 設置 nginx
```
sudo apt update && sudo apt install nginx
sudo systemctl start nginx
vim /etc/nginx/sites-available/default
```
加上以下 config
```yaml
server {
listen 80;
server_name example.com; # Replace with your domain name or server IP
location / {
proxy_pass http://localhost:3000;
proxy_http_version 1.1;
proxy_set_header Upgrade $http_upgrade;
proxy_set_header Connection 'upgrade';
proxy_set_header Host $host;
proxy_cache_bypass $http_upgrade;
}
}
```
## 3. 接著在 AWS Load balancer 那邊新增 target group (目標群組)
> 選擇使用 HTTP
 ## 4. 建立附載均衡器
點選新增負載均衡器,選擇 **Application Load Balancer**
## 4. 建立附載均衡器
點選新增負載均衡器,選擇 **Application Load Balancer**
 1.網路對應三個地區都勾選
2.建立新的安全群組,並且放入 80 port (用原本給的 default 安全群組會無法連線)
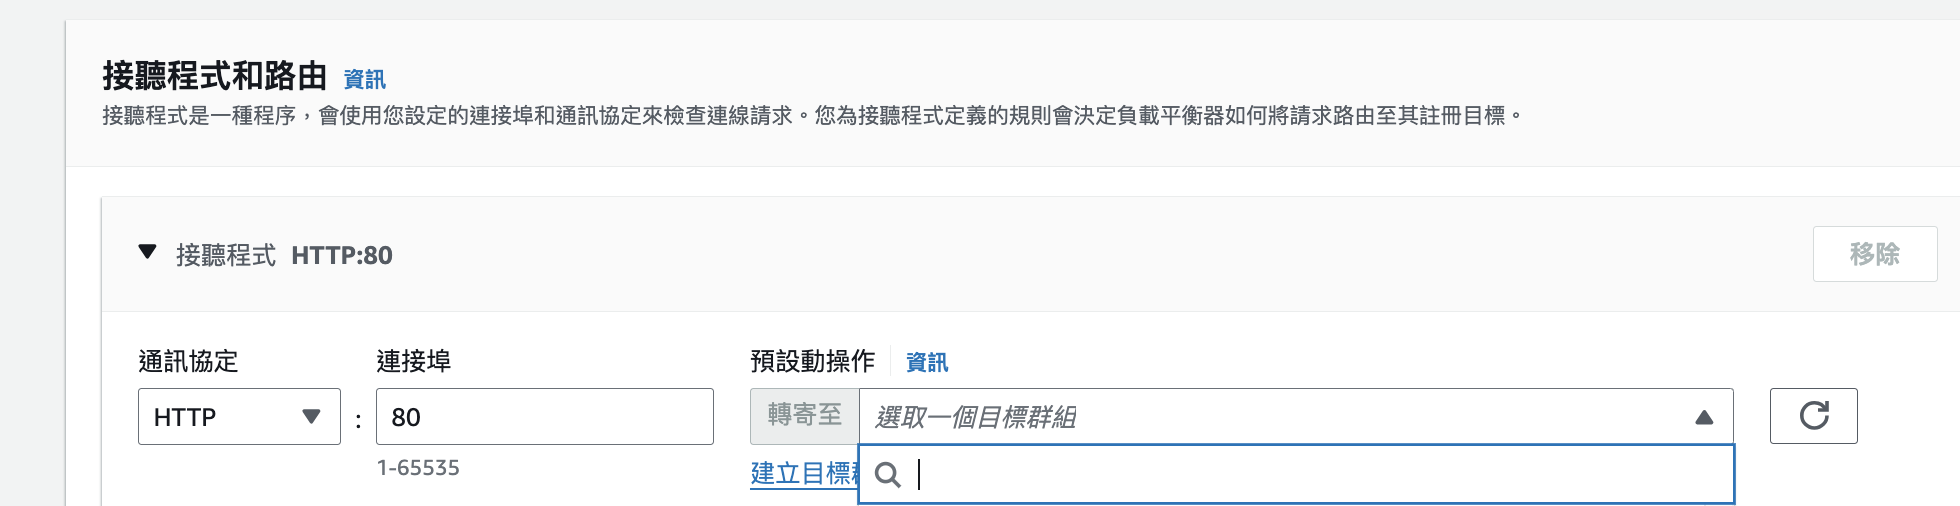
3.如下圖選擇剛才創建的目標群組
1.網路對應三個地區都勾選
2.建立新的安全群組,並且放入 80 port (用原本給的 default 安全群組會無法連線)
3.如下圖選擇剛才創建的目標群組
 4.點選建立即可
## 5.申請 AWS HTTPS 證書
這裡記得地區要先選擇 us-east-1,不然不能綁定到 CDN
之後選擇用 DNS 驗證,之後在右上角直接選擇將它給你的 CNAME 加入按鈕,即可完成驗證,並發行證書。
## 6.建設 CDN
來到最後一步了。
先到 aws cloudfront 頁面,照著以下設置即可
#### 設定內容
* Origin Domain Name: 選擇 ELB
* Origin Path: 空白
* Origin Protocol Policy: **HTTP Only (**CloudFront後面走 HTTP 即可)
* Viewer Protocol Policy: **Redirect HTTP to HTTPS**
* Allowed HTTP Methods: **GET, HEAD, OPTIONS, PUT, POST, PATCH, DELETE**
* Alternate Domain Names: 設定你的網站網址 (api.domain....)
* SSL Certificate: 使用 AWS Certification Manager 建立,將憑證建立在 (us-east-1) 才能使用。
* `備用網域別名`記得設定跟要設置的網域相同,不然之後 route53 無法選擇到該 CDN
## 7. Route53 設置 A 記錄到 CDN
新增一個 A 紀錄,輸入你要的名稱(例如 api ) ,下方來源選擇`別名`,然後選擇剛才創建的 CDN 即可
## 接著即可用剛才設置的 CDN 網域來存取 API Server
4.點選建立即可
## 5.申請 AWS HTTPS 證書
這裡記得地區要先選擇 us-east-1,不然不能綁定到 CDN
之後選擇用 DNS 驗證,之後在右上角直接選擇將它給你的 CNAME 加入按鈕,即可完成驗證,並發行證書。
## 6.建設 CDN
來到最後一步了。
先到 aws cloudfront 頁面,照著以下設置即可
#### 設定內容
* Origin Domain Name: 選擇 ELB
* Origin Path: 空白
* Origin Protocol Policy: **HTTP Only (**CloudFront後面走 HTTP 即可)
* Viewer Protocol Policy: **Redirect HTTP to HTTPS**
* Allowed HTTP Methods: **GET, HEAD, OPTIONS, PUT, POST, PATCH, DELETE**
* Alternate Domain Names: 設定你的網站網址 (api.domain....)
* SSL Certificate: 使用 AWS Certification Manager 建立,將憑證建立在 (us-east-1) 才能使用。
* `備用網域別名`記得設定跟要設置的網域相同,不然之後 route53 無法選擇到該 CDN
## 7. Route53 設置 A 記錄到 CDN
新增一個 A 紀錄,輸入你要的名稱(例如 api ) ,下方來源選擇`別名`,然後選擇剛才創建的 CDN 即可
## 接著即可用剛才設置的 CDN 網域來存取 API Server